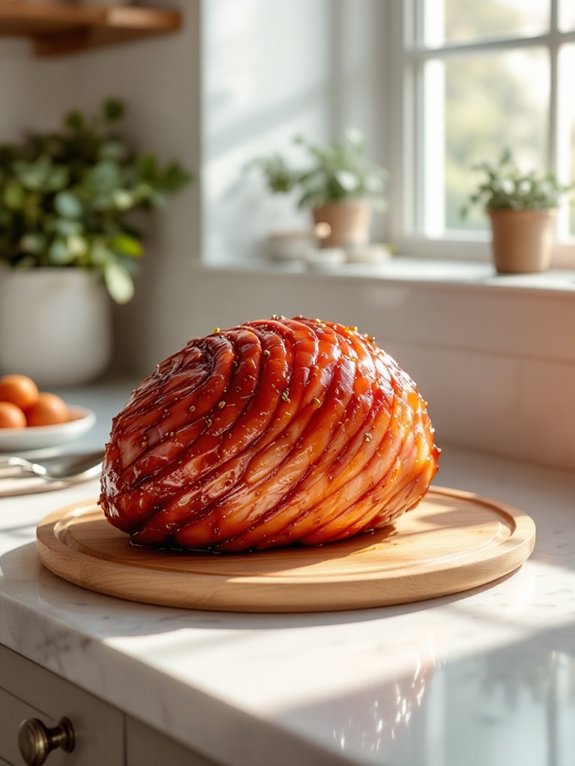
If you're looking for a special meal to celebrate Valentine's Day with your family, cider-glazed ham is a fantastic choice. This dish is not only delicious but also easy to prepare, making it perfect for busy families. The sweet and tangy flavors create a cozy atmosphere that's perfect for sharing moments together. Plus, you can pair it with tasty sides to make the meal even more memorable. Curious about how to make this delightful dish?
Key Takeaways
- Cider-glazed ham is a delicious centerpiece that brings families together for a warm Valentine's celebration.
- The sweet and tangy glaze enhances the savory flavor of the ham, making it a crowd-pleaser.
- Prepare the ham ahead of time, allowing for stress-free cooking on Valentine's Day.
- Pair the ham with sides like honey-glazed carrots and garlic mashed potatoes for a complete meal.
- The inviting aroma of cider-glazed ham fills the home, creating a cozy atmosphere for family gatherings.
Why you'll love this recipe
When you think about a delicious meal that brings everyone together, this Cider-Glazed Ham is hard to beat!
It's not just about the taste; it fills your home with a warm, inviting aroma that makes everyone feel cozy. The sweet and tangy glaze creates a mouthwatering flavor that pairs perfectly with the savory ham, ensuring everyone comes back for seconds.
Plus, it's surprisingly easy to prepare! You can make it ahead of time, freeing you up to enjoy the celebration with your loved ones.
The beautiful presentation makes it an eye-catching centerpiece on your table, impressing both family and guests alike.
Trust us, this dish will become a favorite at your gatherings, especially on Valentine's Day!
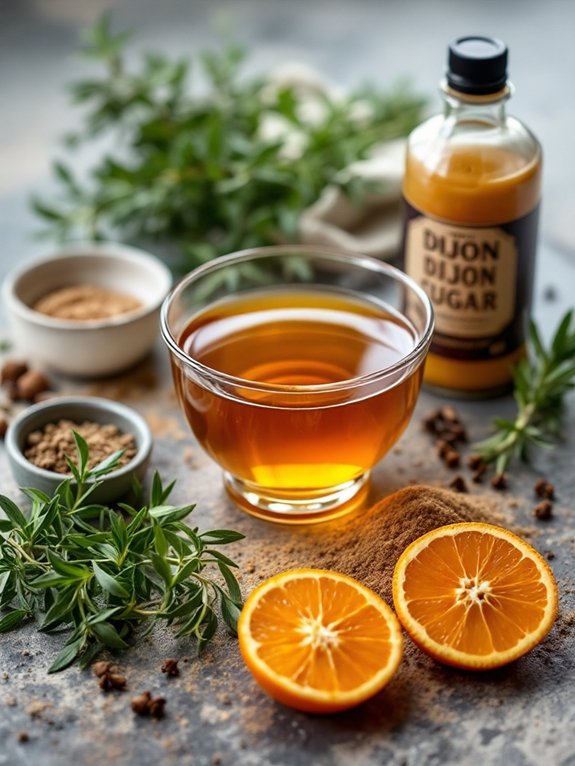
Ingredient notes
To create the best Cider-Glazed Ham, it's important to choose the right ingredients that will enhance the flavor and make your meal a success.
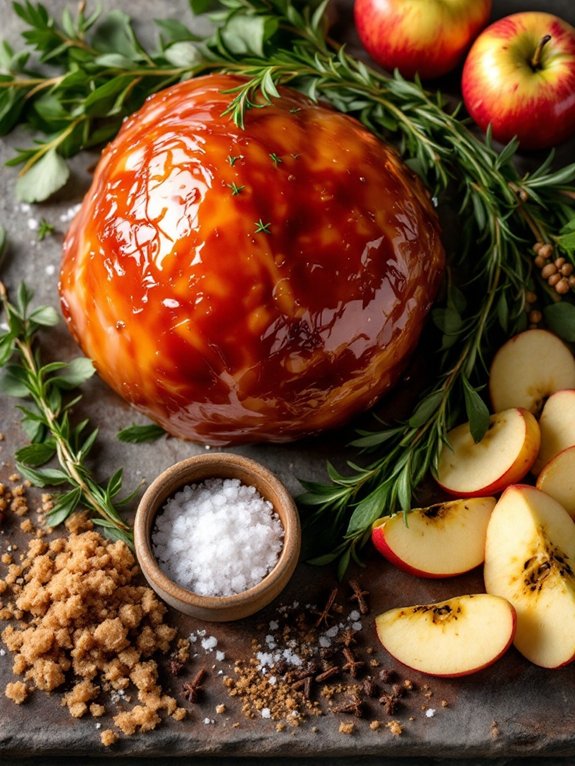
Start with a fully-cooked, bone-in ham weighing 8 to 10 pounds, as this will give you the best taste and texture. For the glaze, fresh apple cider is key—steer clear of apple juice for a more vibrant flavor.
When it comes to brown sugar, you can use either light or dark, but dark sugar adds a richer taste. Don't forget the Dijon mustard, ground cloves, and cinnamon; these spices will elevate the ham's flavor.
Finally, a splash of apple cider vinegar balances the sweetness, creating a truly delicious dish your family will love. The infusion offers health benefits such as digestive support and immune-boosting properties from the use of apple cider and spices in your recipe.
Origin of the recipe
The Cider-Glazed Ham recipe has its roots in traditional holiday cooking, where families often look for a centerpiece dish that brings everyone together.
Originating from the practice of slow-roasting meats, this recipe highlights seasonal ingredients like apple cider, which adds a unique twist.
Over the years, cooks have embraced this sweet and tangy glaze, making it a popular choice for festive gatherings.
It's a dish that not only satisfies hunger but also creates lasting memories around the dinner table.
As you prepare this ham, you're participating in a long tradition of sharing hearty meals with loved ones.
This connection to the past enhances your experience, making each bite even more special during celebrations like Valentine's Day.
How to make the recipe
To make your Cider-Glazed Ham, start by preheating your oven to 325°F.
Next, score the ham's surface to help the glaze soak in, then brush it generously over the ham.
Remember to baste the ham every 20 minutes and tent it with foil to keep it moist while it cooks!
Step 1. Preheat Oven to 325°F
Before diving into the delicious Cider-Glazed Ham recipe, it's important to get your oven ready. Start by preheating your oven to 325°F (163°C). This temperature is perfect for slowly cooking the ham, allowing it to absorb all those wonderful flavors from the glaze.
While the oven heats up, you can gather your ingredients and prepare for the next steps. Remember, a properly preheated oven guarantees even cooking and helps the glaze caramelize beautifully.
Once the oven reaches the right temperature, you'll be all set to create a mouthwatering dish that will impress your family. So, let's get that oven fired up and ready for some flavorful fun! Happy cooking!
Step 2. Score the Ham's Surface
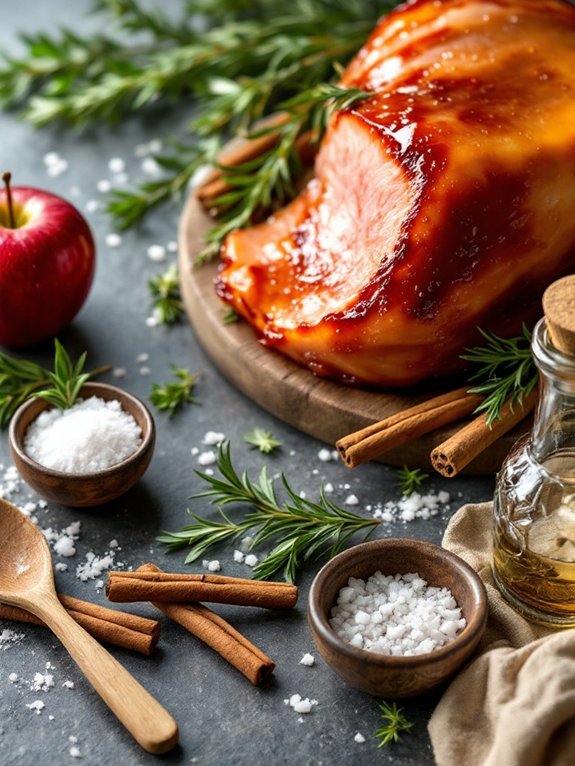
Scoring the ham's surface is a simple yet essential step that enhances both the flavor and presentation of your Cider-Glazed Ham. By making shallow cuts in a diamond pattern, you allow the glaze to seep into the meat and create a beautiful caramelized crust.
Here's how to score your ham:
- Use a sharp knife for clean cuts.
- Make shallow cuts, about 1/4 inch deep.
- Space the cuts about 1 inch apart for even cooking.
- Cut diagonally to create a diamond pattern.
- Avoid cutting too deeply to keep the ham juicy.
Once you've scored the ham, you're ready to brush on that delicious glaze.
Your family will love the extra flavor, and it'll look amazing on your table!
Step 3. Brush Glaze Over Ham
Now it's time to brush that delicious glaze over your ham, and this step really brings the dish to life! Start by carefully removing the ham from the oven.
Grab your reserved glaze and a basting brush. You'll want to generously coat the surface of the ham, letting that sweet and tangy mixture seep into the scored areas.
This glaze not only adds flavor but also creates a beautiful, caramelized crust as it cooks. Don't be shy—make sure every inch is covered for maximum taste!
Once you've brushed it on, return the ham to the oven. It's all about building those layers of flavor, so get excited for that mouthwatering result! Your family will be so impressed!
Step 4. Baste Ham Every 20 Minutes
Basting the ham every 20 minutes during cooking is essential for achieving that perfect, caramelized glaze everyone loves.
This technique helps the glaze penetrate the meat, enhancing its flavor and ensuring a beautiful finish.
Here's how to make the most of your basting:
- Use a baster or a spoon to apply the glaze.
- Start basting when the ham's been in the oven for 30 minutes.
- Make sure to cover all surfaces for even flavor.
- Keep the reserved glaze warm to make basting easier.
- Don't skip the last 30 minutes without basting, as this is when the glaze will truly caramelize.
Step 5. Tent Ham With Foil
When you're ready to bake your Cider-Glazed Ham, tenting it with foil is an essential step that helps keep the meat moist and tender.
Start by covering the ham loosely with aluminum foil, ensuring it doesn't touch the glaze. This allows steam to circulate while preventing the glaze from burning. As the ham bakes, it absorbs flavors from the glaze and stays juicy.
You'll want to keep it tented for the first part of the cooking time, about 1.5 to 2 hours. Remember to remove the foil during the last 30 minutes; this helps the glaze caramelize, giving your ham a beautiful, sticky finish.
With this simple technique, your ham will be a hit at the table!
If you liked this you may also like
If you enjoyed the Cider-Glazed Ham, you might also love trying other delicious family meal ideas that elevate your special occasions.
Here are some tasty options that can impress your loved ones just as much:
- Honey-Glazed Carrots: Sweet, tender carrots that pair perfectly with savory dishes.
- Garlic Mashed Potatoes: Creamy and flavorful, they're a comforting side everyone will adore.
- Roasted Brussels Sprouts: Crispy and caramelized, these veggies add a delightful crunch, especially when enhanced with Crown Royal maple for a unique twist.
- Stuffed Bell Peppers: Colorful and hearty, they're a fun way to serve a nutritious meal.
- Chocolate Lava Cake: End your meal on a sweet note with this gooey dessert that melts hearts.
These dishes will surely create a memorable dining experience for your family!
Frequently Asked Questions
Can I Use a Different Type of Ham for This Recipe?
Yes, you can use a different type of ham for this recipe!
While a bone-in ham works best for flavor, you could try a boneless ham or a spiral-cut ham instead.
Just keep in mind that cooking times may vary, so check the packaging for specifics.
No matter which ham you choose, the cider glaze will still create a delicious dish that everyone will enjoy.
Have fun experimenting with different options!
How Long Should I Let the Ham Rest After Baking?
After baking the ham, you should let it rest for about 15 to 20 minutes.
This resting period allows the juices to redistribute throughout the meat, making it juicier and easier to slice.
Cover it loosely with foil to keep it warm.
If you skip this step, the juices might spill out when you cut it, leaving you with a drier ham.
What Sides Pair Well With Cider-Glazed Ham?
When you're planning sides to go with cider-glazed ham, think about flavors that complement it.
Roasted vegetables, like carrots or Brussels sprouts, add a nice crunch and sweetness. Creamy mashed potatoes are always a hit, soaking up that delicious glaze.
A fresh salad with apples and nuts brings a revitalizing contrast. And don't forget dinner rolls; they're perfect for mopping up every bit of that tasty sauce!
Enjoy your meal!
Can I Make the Glaze Ahead of Time?
Yes, you can definitely make the glaze ahead of time!
Just combine the apple cider, brown sugar, Dijon mustard, cloves, cinnamon, and apple cider vinegar in a saucepan, then bring it to a boil.
Once it thickens, let it cool and store it in an airtight container in the fridge.
When you're ready to use it, simply reheat the glaze before brushing it over the ham.
It'll save you time for your special meal!
Is It Possible to Freeze Leftover Ham?
Yes, you can freeze leftover ham! Just make sure it cools completely first.
Slice the ham into portions, then wrap each piece tightly in plastic wrap or foil.
Place the wrapped slices in an airtight container or freezer bag to prevent freezer burn.
When you're ready to enjoy it again, thaw it in the fridge overnight.
You'll have delicious ham ready for sandwiches or meals anytime you want!
Conclusion
Cider-glazed ham is a fantastic choice for your Valentine's family meal. Its sweet and tangy flavor will create a warm atmosphere that everyone will love. Plus, with easy sides like honey-glazed carrots and garlic mashed potatoes, you'll have a delicious spread that brings everyone together. Preparing the ham in advance means more time for family fun! So, gather your loved ones around the table and enjoy this heartwarming meal that celebrates love and togetherness.


Join Our Flavorful Journey!
Subscribe to our newsletter for exclusive updates, intriguing stories, and delicious new recipes crafted by our talented team.
Don't miss out! Sign up now and be the first to explore our latest creations and tips inspired by Keven's grandmother's wisdom.
Subscribe Today!