If you've ever craved a dessert that combines nostalgia with a contemporary twist, Beavertails À La Drake might just be your answer. These pastries, inspired by Canadian street food, offer a unique opportunity to explore your culinary creativity through various toppings. You'll appreciate the warm, crispy texture that invites experimentation, and each bite could evoke a sense of joy that's hard to resist. So, what's the secret behind crafting these delectable treats, and how can you make them your own? Let's uncover the details that'll transform your kitchen into a dance floor of flavor.
Key Takeaways
- Experience the joy of making Beavertails with customizable toppings inspired by music and culture, bringing fun to your kitchen.
- The warm, crispy texture of these deep-fried pastries is perfect for indulgence and will have you dancing with delight.
- Originating from Canada in the 1980s, Beavertails combine tradition with modern flair thanks to Drake's influence.
- Key ingredients like all-purpose flour, sugar, and instant yeast create a chewy, delicious dough that's easy to prepare.
- Expand your baking creativity with additional treats like churros, baklava, and doughnuts for a diverse dessert experience.
Why you'll love this recipe
When you taste BeaverTails à la Drake, you'll quickly understand why this recipe is a must-try!
This delightful treat combines the joy of cooking with the excitement of customization. You get to stretch the dough into fun shapes, making it a hands-on experience that's perfect for friends and family.
Plus, the variety of toppings means everyone can create their own delicious masterpiece—whether it's classic cinnamon sugar or something more adventurous like Nutella with fresh fruit.
The warm, crispy texture is simply irresistible, and it's a dessert that brings a taste of Canada right to your kitchen.
With its fun preparation and endless topping options, you'll find yourself wanting to make these BeaverTails again and again!
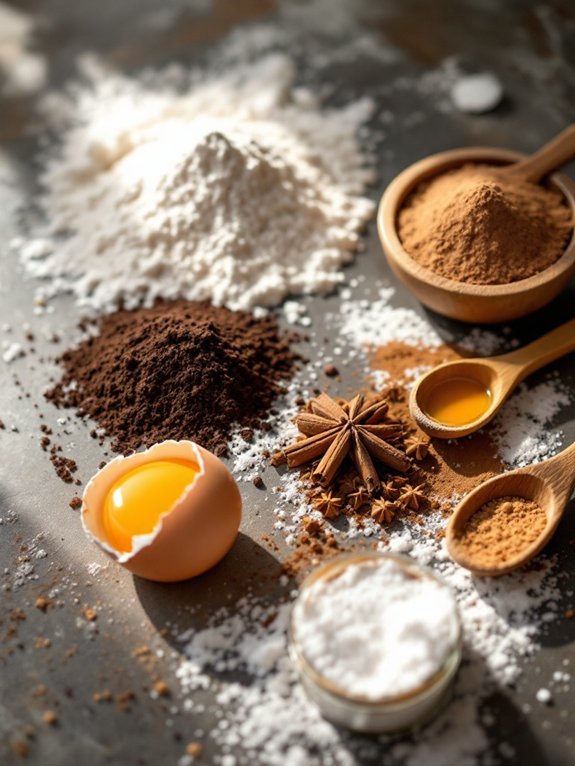
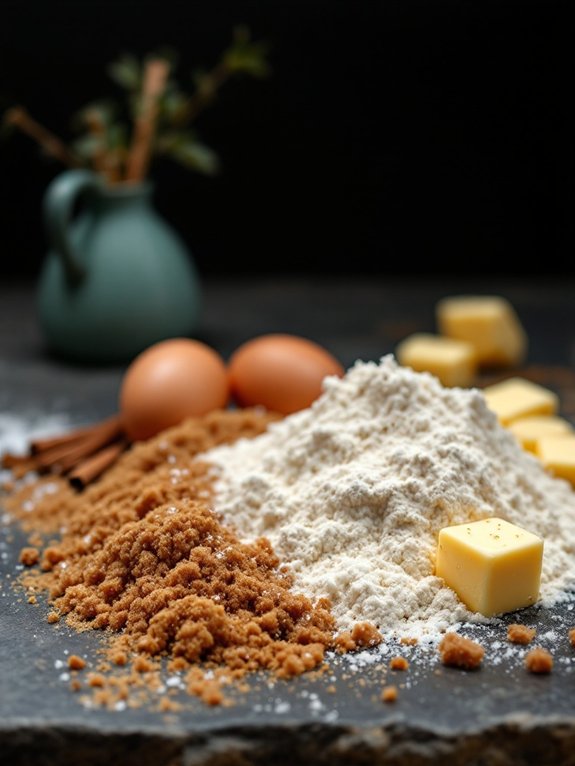
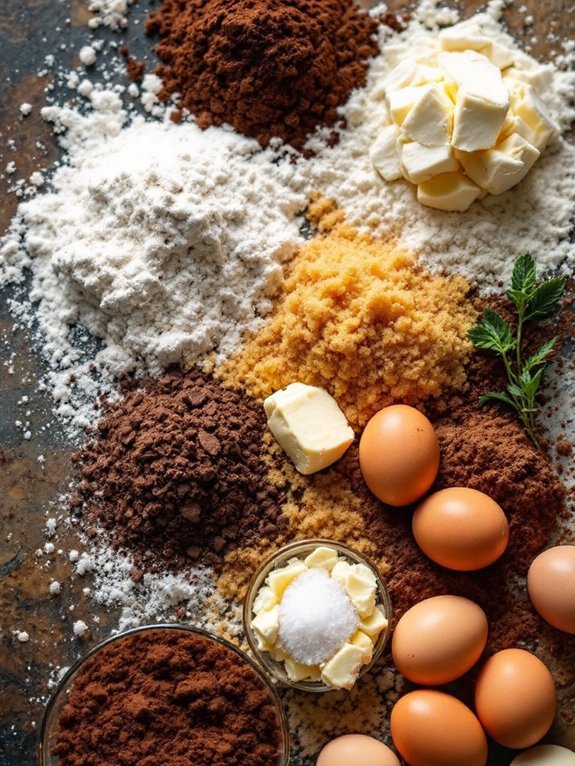
Ingredient notes
Understanding the ingredients is key to making the perfect BeaverTails à la Drake.
You'll need 2 cups of all-purpose flour, which gives the dough its structure and chewiness. A tablespoon of sugar adds a touch of sweetness, while a teaspoon of salt balances the flavors perfectly. Instant yeast is your friend here for a quick rise, but you can use active dry yeast if you don't mind waiting a little longer.
Warm water helps activate the yeast, and a tablespoon of vegetable oil keeps the dough smooth. When frying, feel free to swap vegetable oil for canola oil if you prefer.
Finally, the fun really begins with toppings; mix and match cinnamon sugar, Nutella, fresh fruit, or whipped cream for a delicious finish! Additionally, you can enhance your treat with a refreshing drink such as Christmas Lively Pomegranate Citrus Water Infusion, which is rich in antioxidants and vitamin C.
Origin of the recipe
BeaverTails à la Drake combines the rich heritage of Canadian cuisine with modern flair, giving you a unique twist on a beloved classic.
Originating in the 1980s, traditional BeaverTails are deep-fried pastries shaped like a beaver's tail, often enjoyed at fairs and festivals across Canada.
With Drake's global influence and love for sweet treats, this recipe brings a fresh twist to the classic. By incorporating exciting toppings inspired by his music and culture, you can elevate the experience. Sage infusion's antioxidant benefits not only enhance the culinary aspect but also contribute to overall health, making this treat a delightful balance of indulgence and wellness.
The blend of tradition and innovation reflects both Canadian pride and the joy of creativity in the kitchen.
How to make the recipe
Ready to whip up some delicious BeaverTails? Start by mixing your dry ingredients together until they're well combined, then knead the dough until it feels smooth and elastic.
After letting it rise until it's doubled in size, shape it into those iconic BeaverTail forms and fry them until they're golden brown—your kitchen's about to smell amazing!
Step 1. Mix Dry Ingredients Together
Start by gathering your dry ingredients for a perfect base. You'll need 2 cups of all-purpose flour, 1 tablespoon of sugar, 1 teaspoon of salt, and 2 teaspoons of instant yeast.
Grab a large mixing bowl and combine these ingredients. Mixing them well is key, as it guarantees an even distribution of flavors and helps create the right texture for your BeaverTails.
Use a whisk or fork to blend everything together until it's all combined. This step is super important, so don't rush it.
Once your dry ingredients are nicely mixed, you're ready to add the wet ingredients in the next step. Trust me, this will set you up for some deliciously crispy BeaverTails that everyone will love!
Step 2. Knead Dough Until Smooth
Once your dry ingredients are well mixed, it's time to bring everything together. Gradually add the warm water and vegetable oil to the mixture, stirring until a dough forms.
Now, it's your turn to knead! Transfer the dough to a floured surface and knead it for about 5 minutes. You want the dough to feel smooth and elastic, like a soft pillow.
Here are some tips to help you out:
- Keep your hands lightly floured to prevent sticking.
- Don't rush; the more you knead, the better the texture.
- If it feels too sticky, sprinkle a little more flour as needed.
Once it's smooth, place the dough in a greased bowl, cover it, and let it rest before moving on!
Step 3. Let Dough Rise Until Doubled
After you've kneaded the dough to a smooth and elastic consistency, it's time to let it rise.
Place the dough in a greased bowl and cover it with a damp cloth. This helps create a warm environment, which is perfect for the dough to grow.
You'll want to find a cozy spot, like near a warm oven or in a sunny kitchen corner. Let it rise for about 1 hour or until it's doubled in size.
This rising process is essential because it helps develop those delightful textures you'll love in your BeaverTails.
Once the dough has risen, you'll be ready to move on to the next step and shape your delicious treats.
Get excited—the best is yet to come!
Step 4. Shape Dough Into Beavertails
Now that your dough has risen beautifully, it's time to shape it into those iconic BeaverTails.
Start by dividing the dough into equal pieces, about the size of a golf ball.
Next, on a floured surface, take each piece and gently stretch it into an oval shape with your hands.
Make sure to press the edges slightly to create a thicker border, which helps hold the toppings later.
Don't worry if they're not perfect; that's part of their charm!
- Aim for a thickness of about half an inch.
- Keep your hands floured to prevent sticking.
- Let the shaped dough rest for a few minutes before frying.
With your BeaverTails shaped, you're ready for the next delicious step!
Step 5. Fry Until Golden Brown
As you heat the oil in a deep pan, keep an eye on the temperature to guarantee it's just right for frying.
You want it to be around 350°F (175°C) for perfect BeaverTails. Gently slide the stretched dough into the hot oil, making sure not to overcrowd the pan. Fry each piece for about 2-3 minutes, flipping them halfway through, until they turn golden brown and crispy.
Use a slotted spoon to lift them out, letting the excess oil drip off. Place the BeaverTails on paper towels to drain.
Once they've cooled slightly, they're ready for your favorite toppings. The sizzling sound and enticing aroma will have everyone enthusiastic to dig in! Enjoy your delicious creations!
If you liked this you may also like
If you enjoyed making BeaverTails à la Drake, you might also love trying your hand at other fun and delicious pastries.
Baking can be a great way to express your creativity, and there are so many sweet treats waiting for you to explore. Here are a few ideas to get you started:
- Churros: These crispy, cinnamon-sugar-coated snacks are perfect for dipping in chocolate sauce.
- Baklava: A rich, flaky pastry filled with nuts and honey, it's a sweet treat that's sure to impress your friends and family.
- Doughnuts: You can make your own filled or glazed doughnuts, allowing you to customize flavors and toppings just like with BeaverTails.
Dive into these treats, and let the baking fun continue!
Frequently Asked Questions
Can I Make Beavertails Ahead of Time?
You can prepare BeaverTails ahead of time, but they're best when fresh!
Make the dough and let it rise, then shape the pastries. Instead of frying them, store the shaped dough in the fridge for up to 24 hours.
Just fry them right before serving for that warm, crispy texture!
If you need to, you can also freeze them after frying, then reheat in the oven for a tasty treat later on.
Enjoy!
What Are Some Unique Topping Ideas?
When it comes to unique topping ideas for your BeaverTails, think outside the box! You could try a peanut butter and banana combo for a tasty twist.
Or how about drizzling caramel sauce with crushed pretzels for a sweet and salty mix?
You might even enjoy a s'mores topping with chocolate, marshmallows, and graham cracker crumbs.
Let your creativity shine, and don't be afraid to experiment with flavors that excite your taste buds!
How Can I Make Them Gluten-Free?
To make gluten-free BeaverTails, you can substitute the all-purpose flour with a gluten-free flour blend.
Make sure it contains xanthan gum, which helps with texture.
Follow the same steps for mixing and kneading the dough, but keep an eye on the consistency; it might need slight adjustments with water.
Fry them as usual, and enjoy the crispy goodness topped with your favorite flavors, just like the original recipe!
Can I Freeze Leftover Beavertails?
Yes, you can freeze leftover BeaverTails!
To do this, let them cool completely, then wrap each one tightly in plastic wrap or aluminum foil.
Place the wrapped treats in an airtight container or freezer bag to prevent freezer burn.
When you're ready to enjoy them, just thaw at room temperature or warm them in the oven for a few minutes.
This way, you'll get that fresh, crispy taste again! Enjoy!
What Is the Best Way to Reheat Them?
To reheat your leftover BeaverTails, you've got a couple of great options!
For the best results, pop them in the oven at 350°F (175°C) for about 5-7 minutes. This warms them evenly while keeping them crispy.
If you're short on time, the microwave works too—just heat them for 10-15 seconds, but they might get a bit soft.
Enjoy that warm, delicious taste again and impress your friends with your reheating skills!
Conclusion
Now that you know how to make Beavertails À La Drake, it's time to get creative with your toppings! Whether you prefer classic cinnamon sugar or a wild mix of fruits and chocolates, these treats are sure to impress. Grab your friends and family for a fun cooking adventure, and enjoy the crispy, sweet goodness together. With every bite, you'll feel the joy of Canadian street food, making your taste buds dance with delight!


Join Our Flavorful Journey!
Subscribe to our newsletter for exclusive updates, intriguing stories, and delicious new recipes crafted by our talented team.
Don't miss out! Sign up now and be the first to explore our latest creations and tips inspired by Keven's grandmother's wisdom.
Subscribe Today!