


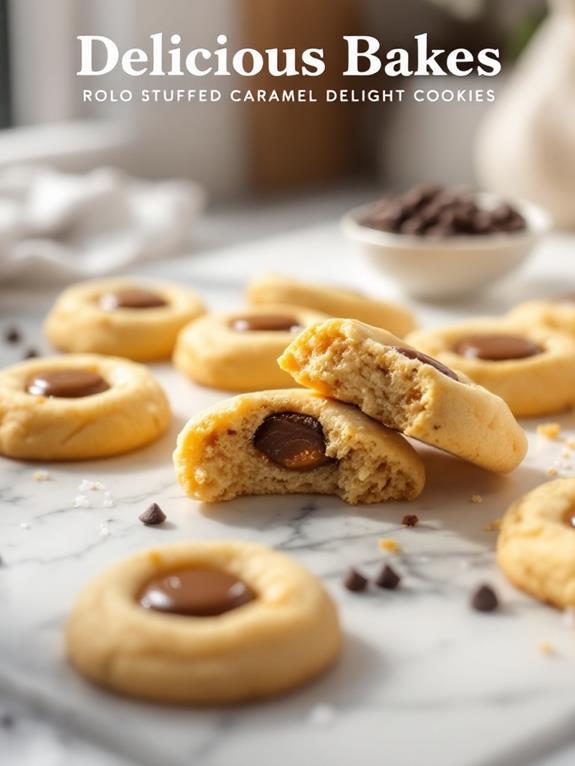
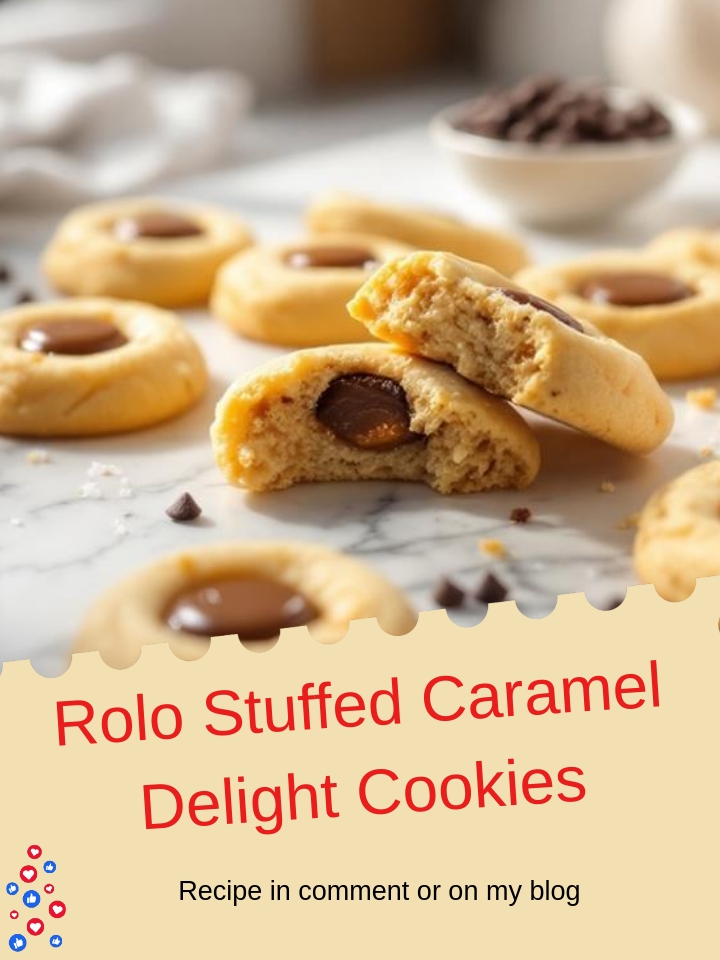
When you think about cookies that combine simplicity and indulgence, Rolo Stuffed Caramel Delight Cookies certainly come to mind. These treats marry buttery dough with the rich, gooey center of a Rolo, creating a unique flavor experience that's hard to resist. You might wonder how such a straightforward recipe can yield such delightful results, and the process itself is quite interesting. It's not just about the ingredients; it's about the technique and timing. What if there are specific tips that can elevate your cookie game even further?
Key Takeaways
- Rolo Stuffed Caramel Delight Cookies combine rich, buttery dough with a gooey Rolo candy center for a delicious treat.
- The recipe includes unsalted butter, brown sugar, eggs, flour, baking soda, chocolate chips, and unwrapped Rolos.
- Chilling the dough for 30 minutes helps maintain shape and enhances flavor while preventing spreading.
- Bake cookies at 350°F for 10-12 minutes until golden brown, ensuring soft, chewy centers.
- Adding flaky sea salt can enhance the flavor contrast of these delightful cookies.
History
The origins of Rolo Stuffed Cookies blend the classic charm of homemade cookies with the indulgent flavor of Rolos, a candy that debuted in the 1930s. Can you envision the excitement of biting into a warm cookie and discovering that gooey, caramel-filled surprise? It's like a party in your mouth!
The combination of chocolate and caramel has long been a beloved favorite, and Rolos have carved out a special place in our hearts since their creation.
Over the years, cookie recipes have evolved, but the essence of homemade goodness remains. People have always loved experimenting with flavors and textures, and the idea of stuffing cookies with candy is a perfect example of that creativity.
When you take a bite of a Rolo Stuffed Cookie, you're not just enjoying a treat; you're also experiencing a bit of history—an intersection of sweet nostalgia and modern baking.
Whether you're reminiscing about childhood memories or creating new ones with friends and family, these cookies are a delightful way to celebrate.
Recipe
Indulge your sweet cravings with these delectable Rolo Stuffed Caramel Delight Cookies. The combination of a rich, buttery cookie dough and the gooey, chocolatey center from the Rolo candies creates an unforgettable treat that's perfect for any occasion.
Whether you're baking for a family gathering, a special celebration, or just to satisfy your sweet tooth, these cookies are sure to impress everyone who tries them.
To make these cookies, begin by creaming together the softened butter and sugars until the mixture is light and fluffy. After incorporating the eggs and vanilla extract, you'll gradually mix in the dry ingredients and fold in the chocolate chips for added richness.
The fun part comes when you scoop out the dough, place a Rolo in the center, and wrap the dough around it before baking. The result is a warm, melty center that contrasts beautifully with the slightly crisp edges of the cookie.
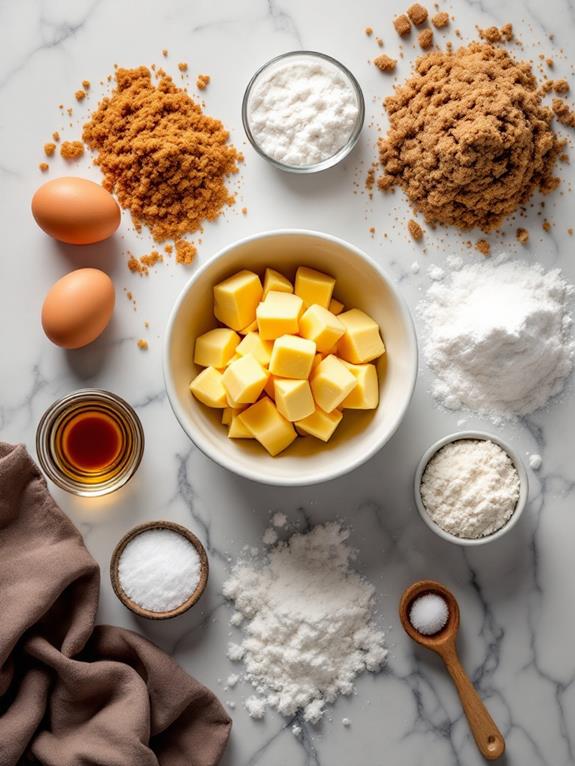
Ingredients:
- 1 cup unsalted butter, softened
- 1 cup brown sugar, packed
- 1/2 cup granulated sugar
- 2 large eggs
- 2 teaspoons vanilla extract
- 3 cups all-purpose flour
- 1 teaspoon baking soda
- 1/2 teaspoon salt
- 1 cup chocolate chips
- 1 bag Rolos, unwrapped
For this recipe, you'll need basic baking ingredients, including butter, sugars, eggs, flour, baking soda, salt, chocolate chips, and Rolos. These ingredients come together to create a delightful cookie that's both chewy and filled with a gooey surprise.
When preparing this recipe, verify your butter is softened to room temperature for easy mixing and peak texture. Using fresh Rolos will guarantee that gooey center you're looking for.
If you want to reduce sweetness, consider cutting back on the granulated sugar. For a flavorful twist, try sprinkling a bit of sea salt on top of the cookies before baking.
While these cookies are a treat meant for indulgence, they do contain ingredients that offer some benefits. Butter provides a source of energy, while eggs contribute protein and essential nutrients.
Chocolate, especially dark chocolate, is known for its antioxidant properties. However, moderation is key, as these cookies are high in sugar and calories, making them best enjoyed as an occasional treat rather than a daily snack.
[DIRECTIONS]:
Step 1. Cream Butter and Sugars
Creaming butter and sugars is an essential step that brings a light and airy texture to your cookie dough. It's like giving your cookies a little spa treatment!
Start with one cup of softened unsalted butter. Make sure it's truly softened—nobody wants to wrestle with cold butter. Toss that into your mixing bowl, along with one cup of packed brown sugar and half a cup of granulated sugar.
Now, it's time to mix! Use an electric mixer on medium speed, and beat the butter and sugars together until they're light and fluffy, which usually takes about 2-3 minutes. You'll know it's ready when it looks pale and creamy—just like the perfect frosting!
Next, it's time to add in two large eggs, one at a time, mixing well after each addition. Don't forget the two teaspoons of vanilla extract; it adds a lovely aroma and flavor that'll make your kitchen smell divine.
This mixture is the backbone of your cookie dough, creating that deliciously rich base. Trust me, once you get this part right, you're on your way to cookie perfection!
Step 2. Add Dry Ingredients Gradually
Now that you've creamed the butter and sugars, it's time to bring everything together by adding the dry ingredients gradually. This step is essential because it helps your dough come together smoothly without clumps.
Start by taking your bowl of flour, baking soda, and salt. Instead of dumping it all in at once—trust me, that could get messy—scoop a little bit in at a time. Mix it gently with your electric mixer or a wooden spoon. You'll notice the dough getting thicker, which is a good sign!
As you add the dry mixture, be sure to stop and scrape down the sides of the bowl every now and then. You want to make sure everything's well incorporated, like a big happy family.
Once you've added all the flour mixture, it's time for the fun part—folding in those delicious chocolate chips! You'll be tempted to sneak a few, and who could blame you? Just envision biting into that warm cookie, gooey chocolate melting in your mouth. Oh, the anticipation!
Keep mixing until everything's just combined, and you're ready for the next exciting step!
Step 3. Wrap Dough Around Rolo

You'll want to grab a portion of the cookie dough you prepared earlier. Now, take about a tablespoon-sized ball of dough in your hands. Flatten it gently, creating a little disc that's ready for its surprise filling.
Next, take a Rolo candy—yes, the gooey caramel-filled chocolate treat we all love—and place it right in the center of the dough disc.
Now comes the fun part! Carefully wrap the dough around the Rolo, pinching the edges together to seal it in entirely. You've gotta make sure no Rolo is peeking out; otherwise, it might escape during baking, and we can't have that!
Roll it in your hands to form a smooth ball, and just like that, you've created a delicious little package of goodness.
Once you've wrapped all your Rolos, you're ready to pop them in the oven. Just envision the warm, melty center waiting for you!
So, get those dough balls lined up on your baking sheet, and prepare for cookie magic. Trust me, your taste buds will thank you when you bite into that gooey surprise!
Happy baking!
Step 4. Chill Dough for 30 Minutes
Chilling the dough for 30 minutes is an essential step that enhances the texture and flavor of your Rolo Stuffed Cookies. I know, waiting can feel like watching paint dry, but trust me, it's worth it!
When you chill the dough, it firms up, making it easier to handle and shape. Plus, it helps the cookies maintain their shape while baking. You don't want a puddle of cookie goo, right?
So, after you've wrapped that dough around your Rolo, go ahead and pop it in the fridge. While you're waiting, why not clean up the kitchen or sneak a few chocolate chips? Just be sure to resist the urge to eat all the dough—it's hard, I know!
Once the dough's chilled, it'll be ready to bake into those delicious, chewy cookies we all love. You'll notice that they'll come out perfectly golden with that gooey Rolo center that makes every bite a little piece of heaven.
Step 5. Bake Until Golden Brown
Baking your Rolo Stuffed Cookies until they're golden brown is the key to achieving that perfect texture and flavor. As you slide that tray into your preheated oven, the anticipation builds. You're not just baking cookies; you're creating little pockets of joy, with each Rolo melting into gooey goodness. Keep an eye on them, though!
After about 10-12 minutes, you'll notice that golden hue creeping in. The edges will start to crisp up, while the centers remain soft and chewy—just the way we like it. If you smell that delicious aroma wafting through your kitchen, you know you're on the right track!
When the cookies are perfectly golden, resist the urge to indulge right away. Let them cool on the baking sheet for a few minutes; this helps them set and makes sure that gooey center stays intact. Trust me, it's worth the wait!
Once cooled, you'll have cookies that not only look amazing but taste even better. So, grab a glass of milk, take a bite, and remember: sometimes, the best moments are made with a warm cookie in hand and a smile on your face! Enjoy!
Pro Tips for Making This Recipe
How can you elevate your Rolo Stuffed Cookies to the next level? First off, don't skip the dough chilling step! Chilling the cookie dough for at least 30 minutes helps prevent spreading, resulting in a thicker, chewier cookie. Trust me, it's worth the wait!
Next, when you wrap the dough around the Rolo, make sure it's fully encased. You don't want any melted caramel escaping during baking—what a tragedy that would be!
If you're feeling adventurous, why not add a sprinkle of flaky sea salt on top before popping them in the oven? The sweet and salty combo is pure magic!
Also, keep an eye on your baking time. Ovens can be tricky; you want them golden brown, but not overdone. And let's face it, there's nothing worse than a dry cookie!
Health Benefits
Surprisingly, Rolo Stuffed Cookies can offer some health benefits when enjoyed in moderation. While you might think of cookies as purely indulgent treats, they can actually bring a bit of joy to your life and even provide some energy for your day.
The butter in these cookies contains healthy fats that can be a part of a balanced diet, giving you that satisfying taste you crave. Plus, the chocolate chips? They're packed with antioxidants, which can help fight off those pesky free radicals in your body.
Additionally, enjoying a warm cookie alongside a comforting beverage like Nutty Almond Vanilla Tea Infusion can enhance the overall experience.
Now, let's not forget about the sugar. Yes, it's true that too much can be a bad thing, but a little sugar can boost your mood and bring back those sweet childhood memories of baking with friends or family.
And when you take that first bite of a warm, gooey cookie, it's like a hug for your taste buds!

Join Our Flavorful Journey!
Subscribe to our newsletter for exclusive updates, intriguing stories, and delicious new recipes crafted by our talented team.
Don't miss out! Sign up now and be the first to explore our latest creations and tips inspired by Keven's grandmother's wisdom.
Subscribe Today!


